I created this page for an article at Get It Scrapped, 12 Ideas for Scrapbooking Travel to Cities. My page is based on a trip to Puerto Vallarta. I used a template from Anna Aspnes Designs (Artsy Layered Template No.50 and masks from Artsy Layered Template No.15) to blend the photo into the background. I used the glows to add to the sunny beachy atmosphere of Puerto Vallarta. Links to the supplies I used can be seen here.
Tuesday, July 31, 2012
Sunday, July 8, 2012
Using Digital Photo Masks on Scrapbook Pages
Debbie Hodge at Get It Scrapped says "In hands-on artistic works, a mask is a protective shield that keeps an area from being affected by an applied medium. For digital creations, that “shield” can end up being the very shape to which a medium is applied. What’s more that medium can be your photo."
Here are some pages I created using photo masks1. Using textured brushes as photo masks

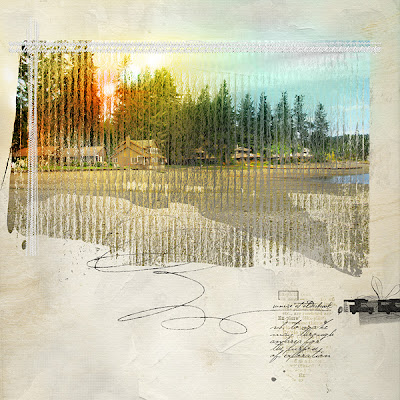
Sunrise at Alderbrook
Any digital element can become a clipping mask for a photo, with an exciting variety of results. On this page I clipped my photo to an opaque brush (Anna Aspnes’ ArtPlay Palette Great Outdoors_Brush 7) that resembled ridged cardboard, causing the ridges of the brush to appear in the photo. I adjusted the shape of the brush to better fit the photo. I also added two layers of Anna’s Great Outdoors_Brush 6 under the clipping mask to add more depth to the photo. Then I used FotoGlows to add light and color to create a sunrise scene.
2. Extending a digitally masked photo outside the borders of a frame

Wine Valley
Supplies by Anna Aspnes Designs:
ArtsyBlendz Origins Paperie
ArtPlay Palette Great Outdoors
LoopDaLoop Travel No. 1
StraightLine Stitched White No.3
Outdoors WordTransfers No.1
WarmGlows No.1
WarmGlows No.2
CoolGlows No.1
(Font: P22 Cezanne)
ArtsyBlendz Origins Paperie
ArtPlay Palette Great Outdoors
LoopDaLoop Travel No. 1
StraightLine Stitched White No.3
Outdoors WordTransfers No.1
WarmGlows No.1
WarmGlows No.2
CoolGlows No.1
(Font: P22 Cezanne)
For more information on the technique used to create Sunrise at Alderbrook check out this: Tutorial: Using Textured Brushes as Masks

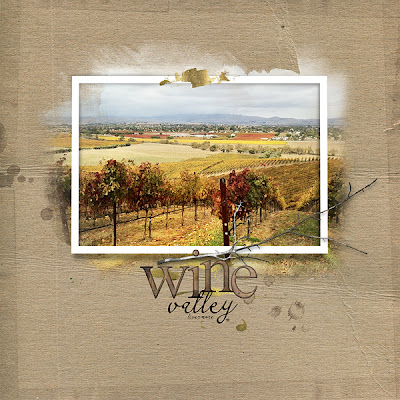
Wine Valley
Extending a digitally masked photo outside the borders of a frame can result in added depth, a softening of borders, and an artsy feel.
Supplies by Anna Aspnes Designs:
ArtPlay Palette Family (branch)
(Font: CK Romance)
Read more about using digital photo masks in this Get It Scrapped article
Thursday, July 5, 2012
Blending Photos into the Sky

Fly me to the moon This is a photo of my mother from the early 1930s. I wanted to create the dreamy illusion that she was riding her wooden horse up to the moon. With a transfer from Anna Aspnes' ArtPlay Palette Wander and a clipping mask from Anna's Original FotoBlendz No.5 it was easy to achieve this effect.
I started with a background paper from ArtPlay Palette Blossom and two cloud image transfer layers from ArtPlay Palette Wander.
Background Layers

The addition of several layers of WarmGlows No.1 and CoolGlows No.1 at overlay mode (both above and below the photo layers helped create the light and glow in the sky. To complete the page I added the following elements from Anna Aspnes: Oversize Hipster Plumes No.1, Summer Word Transfers No.2, moon and stars from Sun and Moon No.1, MagicSprinklez No.2, edge border from ArtPlay Palette No.5 and Stitched by Anna Borders No.2. The font is Brown Cow.
Completed Page

Also consider Anna's Clouds No.1 and Clouds No.2 to achieve the sky effect.

Page View

I then placed Anna's Original FotoBlendz No.5 above the cloud transfers with two photo layers above the FotoBlendz. The first photo at normal mode, the second at darken mode. I used the keyboard shortcut (Mac=Command G) or (Windows=Control G) on both photo layers to clip them to the mask as shown below.
Mask and Photo Layers

Page View


I then placed Anna's Original FotoBlendz No.5 above the cloud transfers with two photo layers above the FotoBlendz. The first photo at normal mode, the second at darken mode. I used the keyboard shortcut (Mac=Command G) or (Windows=Control G) on both photo layers to clip them to the mask as shown below.
Mask and Photo Layers

Page View

The addition of several layers of WarmGlows No.1 and CoolGlows No.1 at overlay mode (both above and below the photo layers helped create the light and glow in the sky. To complete the page I added the following elements from Anna Aspnes: Oversize Hipster Plumes No.1, Summer Word Transfers No.2, moon and stars from Sun and Moon No.1, MagicSprinklez No.2, edge border from ArtPlay Palette No.5 and Stitched by Anna Borders No.2. The font is Brown Cow.
Completed Page

Also consider Anna's Clouds No.1 and Clouds No.2 to achieve the sky effect.
Subscribe to:
Comments (Atom)

